There's a part in the animation where all these items flip up from the ground. Here's a screenie of what my work window looked like when making it. It was acheived by just moving the camera through this 3D space and having all the graphics rotate upward when it got closer. Took a long time!
Sunday, October 28, 2012
Motion Graphic: Graphics #4
It was really hard to get a frame by frame, from the top view of a foot stepping down. I think it kind of worked out successful in the final animation though.
Motion Graphic: Graphics #2
A lot of the cutout effects were acheived by loosely tracing my 3D renders of characters for my game such as:
Motion Graphic: Graphics #1
These are the graphics I created for the main Character Archie. Trying kind of cutout, frame by frame animation that goes along with the music.
Wednesday, September 26, 2012
Motion Assignment Week #4: Clouds
Whoops forgot to upload this one!
This is using Fractal Noise, Corner Pin and CC Toner for the clouds.
CC Rainfall for the rain.
And Advanced Lightning for the lightning.
This is using Fractal Noise, Corner Pin and CC Toner for the clouds.
CC Rainfall for the rain.
And Advanced Lightning for the lightning.
Sunday, September 16, 2012
Motion Graphics Week 3: Puppet Pin Tool
This week we were learning how to animate using the puppet pin tool, in which Sam made this adorable dancing V can and Fanta bottle animation.
Basically the puppet pin tool is the same principle as the inverse kinematics (bone tool) in Flash, or rigging in any 3D Animation program (I use Maya myself). Creating 'joints' allows you to create a virtual skeleton of the flat image you're using in AE. Manipulating these points allows you to create the illusion of animation, sometimes looking fluid, and sometimes looking lame.
This animation I did for my Multimedia studio last year, I ended up using half puppet pin and half traditional tween animation.
Also look, we're finally learning about Motion Blur! You just click on these little circles in the timeline box here. It's almost too easy. Damn you AE.
Sunday, September 2, 2012
Motion Graphics Week 2: Easy Ease and Text
This week we learnt about tween, and easing. Easing is the practice in animation is a term used to describe the transition between keyframes in animation.
This sketch should help clear that up. See how there's more frames at the height of the bounce of the ball
In After Effects, easing is made easy (ha.) by just right clicking the frames and adding 'Ease In' 'Ease Out' or 'Easy Ease' which adds both in and out.
We also learnt about the motion editor which can be used to make custom eases.
Then we did some exercises with animating text in AE. Including adding animators to get more interesting animations such as 'wrigglers'. Which are fun.
Here are some snippets from the tutorial class .pdf
Motion Graphics Week 1: Transform Properties
First week we looked at tweens, and transforming, including the main ones
- Position
- Scale
- Rotate
- Opacity
- Color
I didn't actually go to this week, as I already did a course on After Effects in Semester 1. This is all basic stuff. Here's some snippets from the tutorial class.
Introduction to Motion Graphics
Our next assignment is to create a motion graphic based on
- Title Sequence
- Experimental Animation
- Moving Image
With emphasis on
- How the principles of typography can be applied to motion
- Familarising yourself with trends in title design
- The cultural language of the moving image in film, communication design, new media art
On this blog I will be posting the activities done in class, a single page synopsis of my upcoming motion graphic and a mood board. Have an orange cat
Monday, August 6, 2012
Intital Photoshoot
Wednesday 1st August - Intial Photoshoot
Waking up at 5am is not easy. But since my time was 6am, I went into the city at 5:30am to get the scoop. I aimed to get pictures of the bridges I coveted so much. To experiment with colour in photoshop that my tutor suggested. It was harder than anticipated to get the perfect shot of bridges. So I took a lot of other photos, trying to go for long corridor like scenes, that would work well with a colour gradient kind of style, while still trying to get a story of Melbourne at 6am.
Problems: 6AM in Winter is very dark. We had problems with lighting. Also, we had no tripod so some of the shots are blurry - shakey.
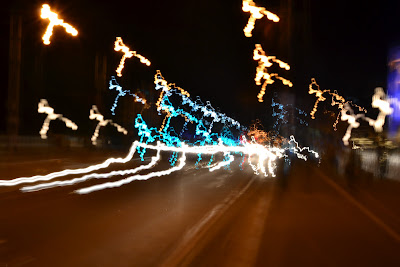
Experimentations with long exposure
Problems: Long exposures cost a lot of battery life!
Going back in next Wednesday with a more clear idea of what I want to shoot!
Sunday, August 5, 2012
Daily Inspiration #1
Abel Gance
Heard about this director in the lecture in the morning. The way Gance used three screens to get a panoramic view througout the theatre was really interesting to me. I want to do something similar with the bridges of Melbourne
Heard about this director in the lecture in the morning. The way Gance used three screens to get a panoramic view througout the theatre was really interesting to me. I want to do something similar with the bridges of Melbourne
Sunday, July 29, 2012
MEL 0:00 - 24:00 Movie Inspirations
Some of the cinematography and lighting that inspired me in my research of movies, and directors. I want a classical, black and white look. Grey like Melbourne skies, with a soft focus to emphasise fog.
I've chosen stills from movies by such directors as Isaac Julien, Dziga Vertov and movies such as La Jetee.
They encompass this kind of nostalgia feeling, and foggy in memory that Melbourne feels like sometimes.
I've chosen stills from movies by such directors as Isaac Julien, Dziga Vertov and movies such as La Jetee.
They encompass this kind of nostalgia feeling, and foggy in memory that Melbourne feels like sometimes.
MEL 0:00-24:00 Photo Inspirations
My time: 6:00AM.
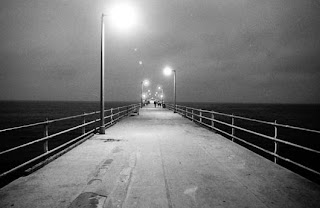
Immediately when I think 6am in Melbourne is everything waking up, coming to life as the day begins. Many people wake up, have a shower, get dressed, eat breakfast and go to work around this time in the morning. I want to represent the struggle of waking up in a foggy Melbourne morning in winter, when it's still dark, and cold. Here are some photos that inspired me while researching the project.
Immediately when I think 6am in Melbourne is everything waking up, coming to life as the day begins. Many people wake up, have a shower, get dressed, eat breakfast and go to work around this time in the morning. I want to represent the struggle of waking up in a foggy Melbourne morning in winter, when it's still dark, and cold. Here are some photos that inspired me while researching the project.
Subscribe to:
Comments (Atom)


